Wheel Bearings

How to Check and Add Grease to Trailer Wheel Bearings 

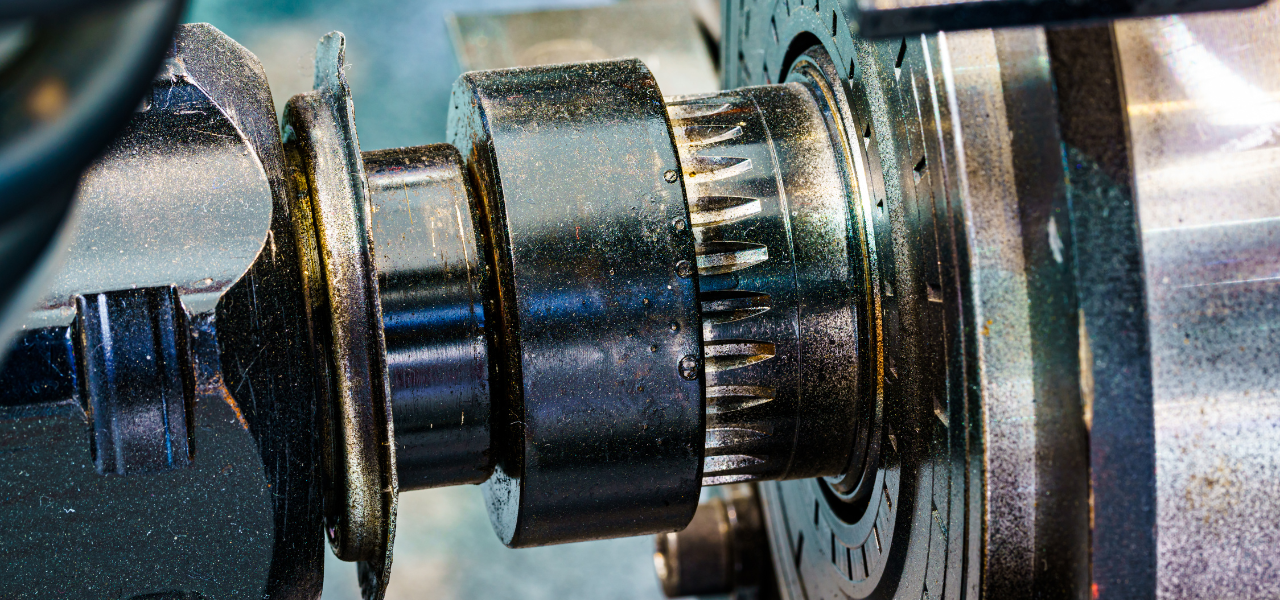
A good day on the water begins with towing it to the ramp unless you keep your boat in a marina. That’s why it is essential to stay on top of your trailer maintenance. Among the trailer structures that must be on your consistent checklist are wheel bearings, more particularly, bearing grease. These wheel bearings are generally located inside the trailer axle hubs and let the wheels spin independently while traveling down the road. 

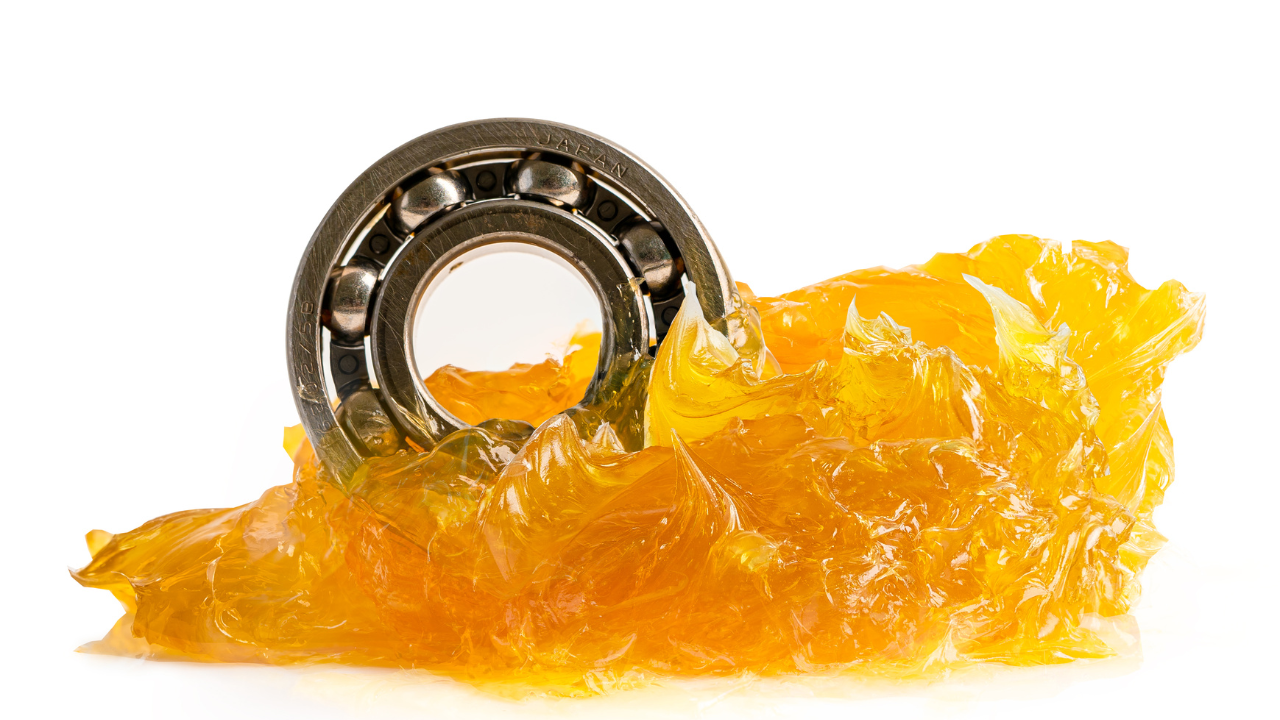
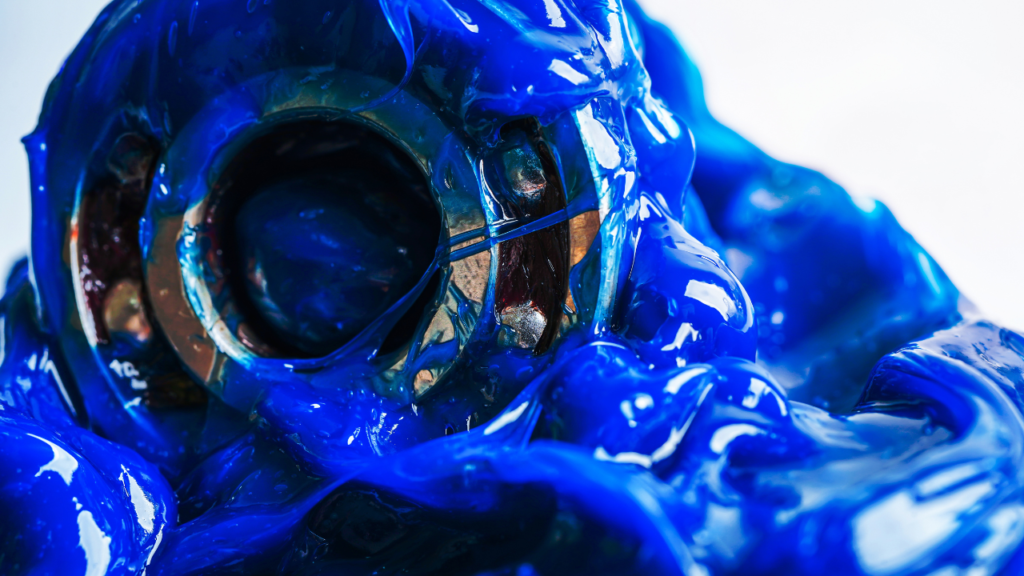
The spinning force generates friction as it travels and the friction produces heat. To prevent the bearings from overheating, they require being lubricated, which is done by filling the inside of the bushings, the part that contains the bearings with grease. Keeping the bearings lubricated and coated with fresh grease can assist you in getting on and off the ramp securely and without problems. 

Bearing Protectors 

Lubricating the bearings is very significant on any trailer, but there is the added challenge on a boat trailer of regularly submerging the wheels and hubs in the water while launching the boat. If the trailer is submerged, the hot bearings and hubs cool instantly. This prepares a vacuum that might suck water through the seals of the bearing. 

To avoid this problem, lots of boat trailers are equipped with bearing protectors. Particularly, a cylinder that is installed on the outside of the hub, and a bearing protector have an inside spring that maintains continuous pressure on the grease in the hub. The pressure aids prevent water from passing past the seal. 

One more great advantage of bearing protectors is that maintenance is negligible. Grease typically doesn’t need to be cleaned and repacked for more than a few years, although you will want to check the instructions of the manufacturer to ensure you’re repacking it frequently. However, it is necessary to check the fat level and top it up if necessary. 

How to Test and Top off Grease 

  • Eliminate the protective cap from the bearing.
  • Test the level of the grease by pressing the edge of the spring-loaded piston. The hub has enough grease whether you can rock or move the piston. Don’t add more. you will need to add more grease if the piston does not move.
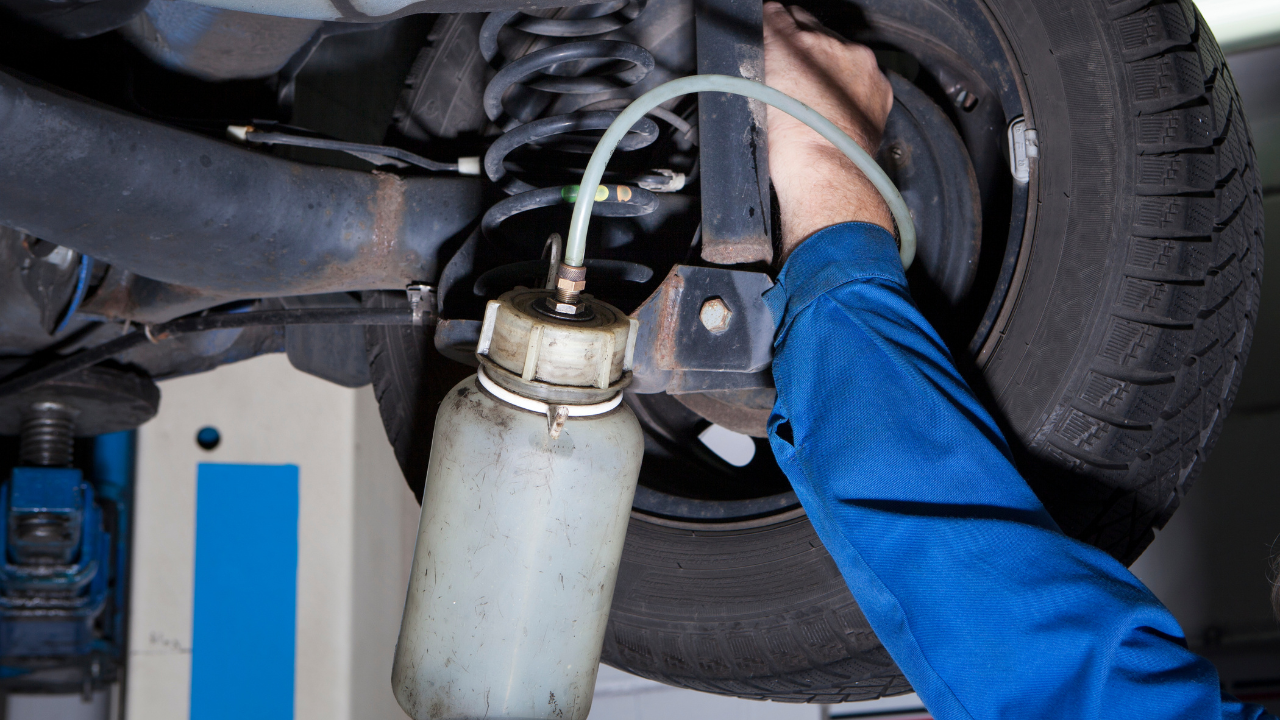
  • Mount a grease gun with a hand pump to the grease fitting in the center of the piston. Pump grease until you watch the piston begin to move outward and then stay adding grease until the piston rocks about 1/8 inch once you press the rim.
  • Although not necessary, you can jack up the trailer so that you can rotate the tire independently and assist in distributing the grease before towing.
  • Wipe off excess grease before changing the cap on the bearing protector.

Take Care of Your Wheel Bearings 

Actually, not all trailers are equipped with spring-loaded wheel bearings protectors. Your trailer may have oil bath buckets, sealed grease hubs, or some other diversity. Several are designed to be practically maintenance-free all season long, however, you should always check that you have the right amount of lubricant, that there are no leaks, and that the bushings are not extremely hot after towing. 

In particular, always follow the instructions of the trailer maintenance as well as the service schedule charted by the manufacturer. A trailer shop or dealer can provide service or advice when you are not happy handling maintenance yourself. Most significantly, make taking care of your trailer a priority for the reason that it is essential to keeping you and your trip after trip, season after season. Read more about wheel bearings maintenance.

Continue Reading
rockwell 12011-1

The 7 Easy Steps to Changing Your Engine Oil 

It’s important to keep an eye on your Rockwell 12011-1 oil cap when changing the engine oil. While you might think the oil cap is a non-consequential factor, think again. This is one of the most important components of the vehicle and you need to keep this safe while changing the oil. Fortunately, it’s easier than you think to change the engine oil. 

So, what steps should you try? 

Turn On the Engine for Five Minutes 

It’s important to heat the oil before you change it. Now, this means you will need to switch on the engine for around five minutes or so. This should be sufficient enough to heat the oil but not to the point that it’s too hot to handle. So, this is easy enough to do and not too troublesome.  

Secure Your Vehicle and Jack It Up 

When you have heated the oil, it’s time to put your car into park and secure it. Park the vehicle in a safe location that allows you ample room to work on it. You might also want to jack up the front of the vehicle either with a floor jack or a ramp. Again, the vehicle must be secured before you continue to work on it. Make sure the engine is switched off too.  

Remove the Rockwell 12011-1 Oil Cap and Keep It Safe 

Lift the hood of your car and find the Rockwell 12011-1 oil cap. You will need to remove the cap and keep it safe. If the oil cap isn’t there, you should take steps to replace it as it’s an important part of the vehicle. Without an oil cap, the oil will likely spill out into the engine and cause serious issues. So, it’s best to keep the cap safe at all times.  

Change the Old Oil Filter 

You need to remove the old oil filter and drain whatever oil is left behind. Put a pan underneath the vehicle to catch the oil and clean around the filter. Remove any oil remnants and the surrounding areas too. You should install a new oil filter now and secure the filter in place too. Clean the engine to avoid problems later.  

Drain the Excess Oil 

The crankcase will have some remnants of oil left behind and it’s important to clear it away. So, keep the pan under the drain plug and unscrew the plug. Make sure not to drop it into the drip pan. Drain the oil for a few minutes then replace the plug and wipe away the excess oil.  

Add New Oil into the Engine 

You need to put a funnel into the oil hole (where you removed the cap) and pour in some new oil. Make sure you follow the manufacturer’s specifications and recommendations to avoid trouble. You should then replace the Rockwell 12011-1 oil cap. Wipe any excess oil away with a rag or soft cloth.  

Run the Engine 

You will need to establish a balanced oil pressure which means running the engine for a good five minutes or so. This is the time when any spillages will surface. So, take a look under the vehicle just to make sure there are no leaks. You can adjust the engine if there are leaks before you lower the vehicle again.  

A Simple Way to Change the Oil 

Changing your engine oil is far easier than it sounds. Yes, there is a little bit of effort that goes into it but with a little know-how, it’s simple. While you can call on a mechanic to help with such things, you shouldn’t need to. Of course, it all depends on how comfortable you feel doing it. So, keep your Rockwell 12011-1 oil cap safe and it’ll be so simple to change the oil.  

Continue Reading
How to Grease Your Trailer

How to Grease Your Trailer

Every part of the trailer is important, from the Rockwell 12011-1 oil cap to the axle and bearings. Being a responsible trailer owner means knowing how to care for it and ensuring its maintenance is up to par. Poor maintenance leads to extensive problems and most are expensive, to say the least. Learning to grease a trailer is crucial and will make life easier for you too. So, how to grease a trailer, and should you rely on a mechanic for help?

Grease the Coupler and Hitch Routinely

When you’re towing a trailer, the hitch ball and coupler take most of the strain. These must be kept in the best condition possible. You should have a regular grease schedule for the hitch ball and coupler. After every tow, grease them thoroughly. It might also be wise to grease them every five-to-six thousand miles. Monthly and six-month servicing is useful to ensure everything is running as it should.

Grease the Jack and Pintle Semi-Regularly

The pintle doesn’t need to be greased every month, every six months should be sufficient. It’s the same with the jack system, a yearly servicing is all that’s required. These are far easier to manage since they’re a semi-regular maintenance issue. You could also maintain the Rockwell 12011-1 oil cap once every few months.

Greasing the Axles

Depending on the type of trailer axles you have, it could be fairly straightforward. If you have a grease zerk on the axle, you’ll need to grease them every six thousand miles (or around six months). It’s easy to do. You need to remove the plug from the axle and insert the grease gun in the zerk. Once there is sufficient grease inside, replace the cap and you’re good to go. Click here to read more about When Should I Perform a Differential Oil Change?

Should You Call a Mechanic to Grease the Trailer?

Greasing a trailer isn’t difficult but can present a challenge or two. It depends on your fitness, physical abilities, and what you feel confident doing. Some people just won’t grease the trailer because they don’t want to or just can’t. You don’t always need to call a mechanic to grease your trailer; however, if you aren’t confident, it’s best to let them handle it. On another note, if you are worried about under-greasing the various components, get a mechanic’s advice.

Simple Greasing Tips to Consider Using

Bearings are one of the most important elements of a trailer and if they aren’t lubricated sufficiently, things can go wrong. So, here are a few tips that could help you make greasing the bearings a lot easier.

  • Put a small amount of grease onto your hand and press the outer edge of the bearing into the grease.
  • Ease the grease into the bearing and rotate it to ensure it is sufficiently greased.
  • Don’t forget the grease on the surface of the bearing cup. Greasing the bearings can be simple with a little know-how.

Grease Well

Proper maintenance isn’t always given serious thought when it comes to trailers. Sometimes, it’s a notion that goes fleeting by without a second thought. Regardless, you must grease the trailer properly to ensure it runs effectively. Any issue can create long-lasting effects and could be costly to fix too. Every part of a trailer must be maintained, including the Rockwell 12011-1 oil cap. You can also read about Oil filter: Genuine/OEM vs. the Third-party by visiting https://www.autohaus-dietler.com.au/2019/08/oil-filter-genuine-oem-vs-third-party/

Continue Reading
Six Steps to Changing Differential Fluid

Six Steps to Changing Differential Fluid

A Rockwell 12011-1 oil cap should be maintained throughout its duration. It’s not something most people think about, but vehicles should always be properly maintained. From the axles to the oil cap and filter – every inch should be cared for because things can go wrong quite easily. Unfortunately, things go wrong, and it could be down to the differential. Changing the differential fluid is not as complex as it appears to be. With a little know-how, you shouldn’t run into difficulty. So, what steps do you need to know to change the differential fluid in your vehicle?

Secure the Vehicle

You must ensure the vehicle is stationary and in a safe place to work on. For example, a private driveway or garage would be ideal since you’re less likely to be interrupted there. Next, you need to use a jack and a stand to secure the vehicle in place. This is imperative to ensure your safety (or the safety of whoever works on the vehicle).

Drain the Oil

You will need to find the differential drain bolt and place a pan underneath it. Remove the bolt and let the oil drain away. This, however, needs ample time to drain fully; it’s not a process that can be rushed. When the oil has drained away, wipe the bolt down and attach it back to the vehicle.

Find the Fill Bolt

You will now need to find the gear oil fill bolt. This shouldn’t be too difficult to locate. Once you have found it, you should remove it. You may want to clean any excess grease off it as you would if you were replacing a Rockwell 12011-1 oil cap.

Start Pumping the Oil

It’s time to add the new gear oil to the differential, so you’ll need to locate the fill bolt. Carefully pump the gear oil into the bolt. You will need to use a pump and slowly add the oil. It’s important to use the right type of oil, preferably one that’s recommended by the manufacturer.

Start Pumping the Oil

Adding the Right Oil

Continue to pump the oil into the differential until the oil begins to spill out of the fill hole. You want to be careful here, however, as the right amount should be used. Too little won’t be sufficient and may cause problems with the engine later. You can more about How to Grease Your Trailer by visiting https://www.valdis-motozone.com/how-to-grease-your-trailer/

Put the Finishes Touches to the Differential

The final step is to replace the fill-hole bolt and secure it in place. Once you have done this, remove any excess oil and you’re good to go. it isn’t a difficult process and shouldn’t take too long to complete either.

Make the Change Simple

Changing the differential fluid is straightforward with a little know-how. Of course, it seems difficult when you’ve never attempted it before. Fortunately, things can be done in a few

simple steps. It will make a huge difference and will save you money since you don’t need to go to a mechanic. Knowing how to change the differential fluid is important as it’s a crucial part of the maintenance process. You want to care for every part of the vehicle, from the Rockwell 12011-1 oil cap to the axles and gears. You can also read about Managing, Reusing, and Recycling Used Oil by clicking here.…

Continue Reading

When Should I Perform a Differential Oil Change?

Maintenance remains crucial for vehicles everywhere, whether you service the Rockwell 12011-1 oil cap or make a differential oil change. Every part of the vehicle must be maintained to ensure safety on the road. Of course, there are some areas of vehicle maintenance that confuse most. One part of the routine is performing a differential oil change. This might initially seem complicated but it’s actually one of the simplest changes you can make without a mechanic’s intervention. So, what should you know about differential oil changes, and when is one necessary?

Understanding the Differential

Vehicles have a drivetrain that takes the torque to the axles from the drive shaft. This is the element that gives the wheels their power. Depending on whether you have a four, front, or rear-wheel drive, a vehicle can have more than one differential. Typically, a rear-wheel drive has the differential located on the rear of the vehicle with a gearbox (that contains the gears). You must lubricate these effectively to ensure they don’t wear out quickly. When the heat becomes too much, it creates a breakdown, and an oil change is needed.

Check the Manufacturer’s Recommendations

Every model of vehicle has a manufacturer’s guide in terms of when a differential oil change is needed. It’s important to refer to the user manual (that should come with the vehicle upon purchase) and find out what the manufacturer recommends. If you don’t have the manual, contact the manufacturer directly.

Typically, a differential fluid change is needed every fifteen thousand miles, depending on the vehicle. If you take long trips, an oil change will be needed quicker and more frequently. It’s the same when you’re hauling heavy loads or towing trailers, frequent changes are necessary. Off-road conditions impact oil changes too. It’s the same when you want to service a Rockwell 12011-1 oil cap, it must be done properly.

Be Smart with the Oil Change

Take it Easy

A differential oil change is pretty straightforward. It will, however, require a lot of patience and care. You’ll need to use a jack stand to lift the vehicle off the ground. It’s important to secure and stabilize the wheels so the car won’t move in any way when you’re working on the car. You can read more about Six Steps to Changing Differential Fluid by visiting https://www.valdis-motozone.com/six-steps-to-changing-differential-fluid/

You should remove the fluid fill plug and bolts (apart from the top one) and let the oil drain slowly. Once the oil has fully drained, remove the last bolt and cover. Remove the old grease and inspect the gasket. Replace the gasket, if necessary, then add new fluid and replace the plug.

Be Smart with the Oil Change

A differential oil change doesn’t have to happen every week or even every month; this is a semi-regular task but an important one. This does need to be handled properly; it means being patient and cautious. You need to let the fluid drain fully – which can take time to do. A differential oil change is simple and can make a big difference when it comes to ensuring the vehicle runs smoothly. Proper maintenance is necessary, whether you’re dealing with a Rockwell 12011-1 oil cap or a differential oil change. Click here to read about Car Filters And Why It’s Important To Change Them.…

Continue Reading